Vintage Eighteen Birthday Cake
Highlighted under: Baking & Desserts
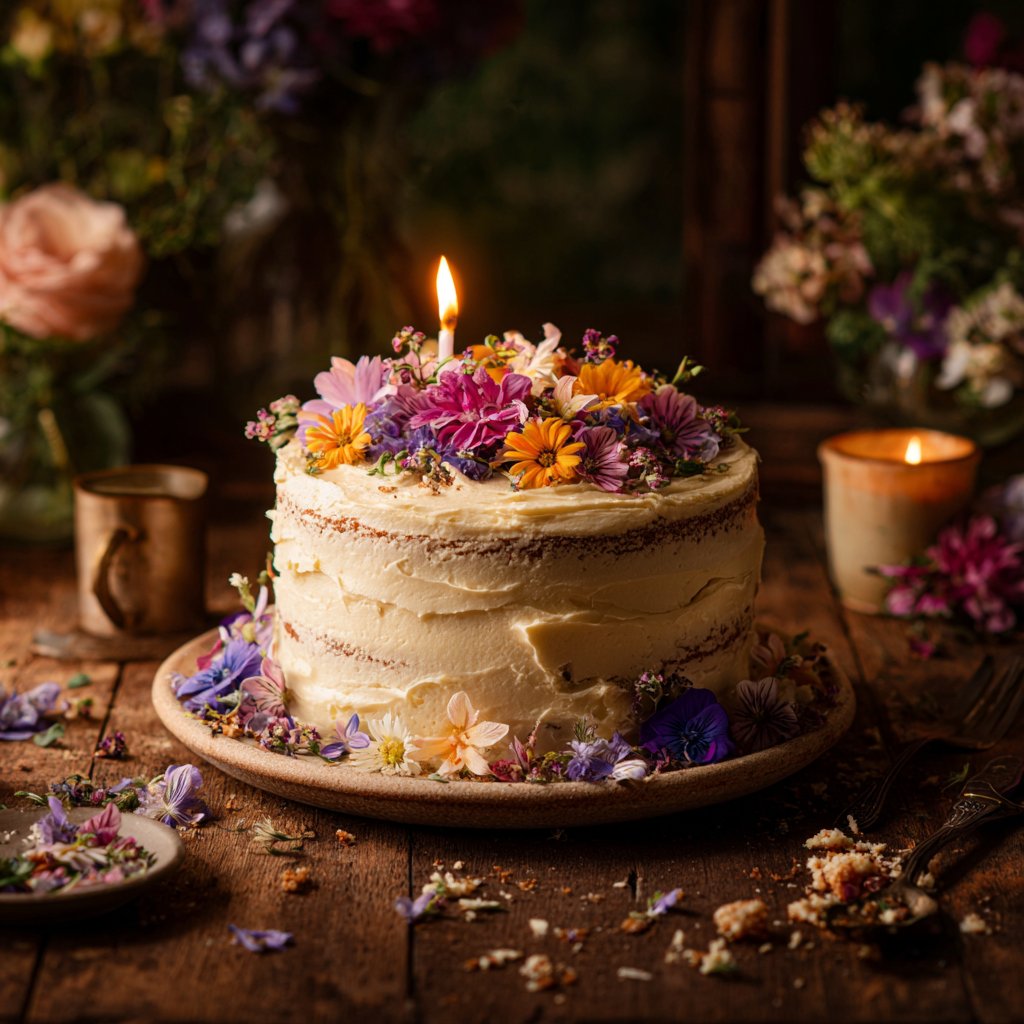
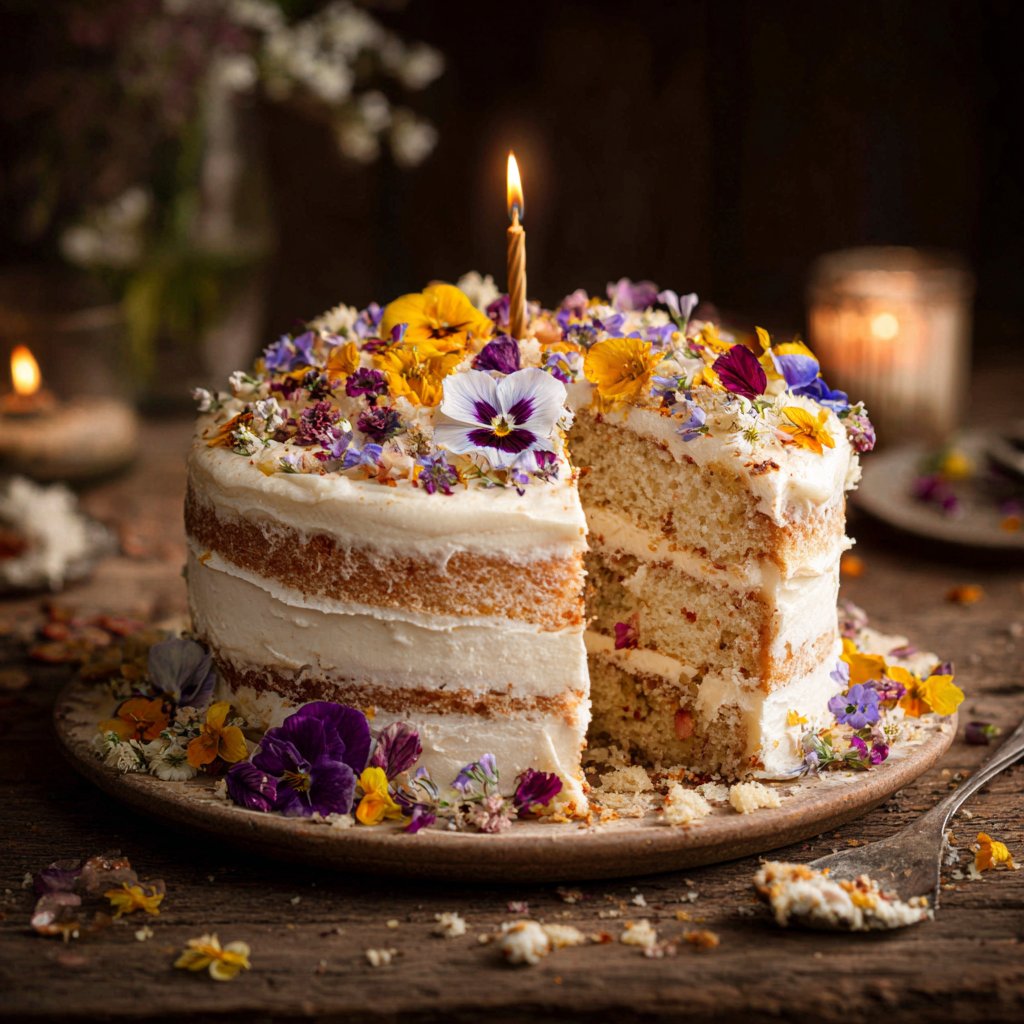
I’ve always had a fondness for vintage cakes, especially when it comes to celebrations. This Vintage Eighteen Birthday Cake is my go-to for special occasions, combining classic flavors with a nostalgic touch. I love how the layers of fluffy sponge and rich buttercream create a stunning centerpiece to any birthday party. The charming design and vibrant color palette are sure to impress, making it a perfect surprise for someone turning eighteen. It’s a cake that not only looks great but tastes even better!
Creating the Vintage Eighteen Birthday Cake was a delightful experience, filled with fond memories of baking with my grandma. She always believed that the secret to a great cake is in the care taken with each layer. I chose classic vanilla and chocolate flavors for a timeless appeal, and I learned that using room temperature ingredients helps achieve a light and fluffy texture.
As I decorated the cake, I made sure to incorporate fresh flowers and vibrant frosting to keep it celebratory. One tip I found essential was letting the cakes cool completely before frosting. It prevents melting the icing and ensures a clean, beautiful finish. This cake truly embodies the joy of celebrating life and milestones!
Why You'll Love This Cake
- Stunning, vintage-inspired design that will impress guests
- Layers of rich flavors combining chocolate and vanilla
- Perfectly moist texture, making it hard to resist a second slice
Understanding Cake Ingredients
The key to a successful vintage birthday cake lies within the balance of its ingredients. Using high-quality unsalted butter ensures a rich flavor without the added saltiness that can alter the cake's profile. Since butter is aerated during the creaming process, it’s crucial to let it soften to room temperature; this usually takes about 30 minutes. The butter should be light and fluffy before you start adding sugar, as this step creates tiny air pockets necessary for the perfect rise.
Eggs not only contribute moisture but also act as a binder, providing structure. For the best results, use large eggs at room temperature for even mixing. If you're in a pinch, you can substitute each egg with 1/4 cup of unsweetened applesauce, which will also add a hint of sweetness and maintain moisture, especially useful in a cake designed to impress.
Frosting Techniques
Making the buttercream frosting can be tricky, especially achieving a smooth texture. I recommend beating the butter for at least 5 minutes until it’s light and creamy, which helps create a fluffy consistency. If your frosting seems too thick, adding the heavy cream gradually will loosen up the mixture, allowing it to spread easily on the cake. For a delicious touch, consider infusing your frosting with additional flavors like almond or lemon zest to elevate the taste profile further.
If you plan to add food coloring, I suggest using gel food coloring as it yields a more vibrant hue without altering the frosting's consistency. Be cautious when mixing in the coloring; add a little at a time and thoroughly mix until you achieve the desired shade. This technique helps you avoid an overly tinted or runny frosting while ensuring that your cake's visual presentation remains stunning.
Assembling and Storing the Cake
Layering the cake is where the fun begins, but it’s also where some people encounter difficulties. Be sure that each layer of cake has cooled completely—this prevents melting the frosting and ensures an even application. To assemble, place strips of parchment paper under the edges of the cake before frosting; this allows you to create a clean finish without frosting smearing onto the plate and makes cleanup a breeze.
If you're not serving the cake immediately, store it in an airtight container to keep it fresh. It can be refrigerated for up to five days or frozen for up to three months. Just be sure to wrap it tightly in plastic wrap and foil to avoid freezer burn. When ready to enjoy, simply thaw the cake in the refrigerator overnight and bring it to room temperature before serving for the best flavor.
Ingredients
Ingredients
For the Cake
- 2 cups all-purpose flour
- 1 ½ cups sugar
- 1 cup unsalted butter, softened
- 4 large eggs
- 1 cup whole milk
- 2 tsp vanilla extract
- 1 ½ tsp baking powder
- 1 tsp baking soda
- ½ tsp salt
For the Buttercream Frosting
- 2 cups unsalted butter, softened
- 4 cups powdered sugar
- 2 tsp vanilla extract
- 2 tbsp heavy cream
- Food coloring (optional)
Feel free to add any decorations of your choice!
Instructions
Steps
Prepare the Batter
Preheat the oven to 350°F (175°C). In a mixing bowl, cream the softened butter and sugar until light and fluffy. Add the eggs one by one, mixing well after each addition. Incorporate the milk and vanilla extract.
Mix the Dry Ingredients
In a separate bowl, whisk together the flour, baking powder, baking soda, and salt. Gradually add the dry ingredients to the wet mixture, blending until just combined.
Bake the Cake
Divide the batter evenly between two greased and floured 9-inch round cake pans. Bake for 25-30 minutes or until a toothpick inserted in the center comes out clean. Allow the cakes to cool completely before removing them from the pans.
Make the Frosting
While the cakes are cooling, prepare the buttercream frosting. Beat the softened butter in a bowl until creamy, then gradually incorporate the powdered sugar. Add the vanilla extract and heavy cream, mixing until smooth and fluffy. Add food coloring if desired.
Assemble the Cake
Once the cakes are cooled, place one layer on a serving plate. Spread a generous amount of frosting on top, then place the second layer over it. Use the remaining frosting to cover the top and sides of the cake.
Decorate as desired!
Pro Tips
- To enhance flavor, consider using almond extract in the batter. This cake can be made a day ahead
- just store it in an airtight container to keep it fresh.
Tips for Flavor Enhancements
If you're looking to add an exciting twist to this classic recipe, consider incorporating fruit purees. A layer of raspberry or strawberry puree between the cake layers adds a delightful tartness that complements the richness of the buttercream perfectly. Aim for about half a cup of puree per layer, and spread it thinly to avoid overpowering the cake's flavor.
Another great enhancement is vanilla bean instead of extract. The small black specks not only provide visual appeal but also deepen the vanilla flavor in both the cake and frosting. Using fresh vanilla beans might feel extravagant, but a little goes a long way, and it’s well worth the investment for a special occasion.
Scaling Recipes and Customization
This cake recipe can easily be scaled up or down depending on your needs. For a smaller gathering, consider baking this as a single 9-inch layer. Just halve the ingredients and follow the same baking instructions, keeping an eye on the time; it may take around 20-25 minutes to bake through. If you want to create additional layers for a grander celebration, multiply the ingredients by two, and layer them with your favorite fillings.
Customization based on dietary restrictions is also achievable. For a gluten-free version, substitute all-purpose flour with a 1:1 gluten-free flour blend. Be aware that texture may vary slightly, but with the right blend, you can achieve a moist cake that everyone can enjoy. Whether opting for a classic or a unique variation, this cake is versatile enough to match the tastes of many guests.
Questions About Recipes
→ Can I use different flavors for the cake?
Absolutely! Feel free to experiment with chocolate, lemon, or almond flavors.
→ How do I store leftovers?
Store leftover cake in an airtight container at room temperature for up to three days.
→ Can I freeze the cake?
Yes, you can freeze the cake layers wrapped tightly in plastic wrap for up to three months.
→ What can I use instead of butter in the frosting?
You can use shortening or a dairy-free alternative for the frosting.
Vintage Eighteen Birthday Cake
Created by: The Epicurelane Team
Recipe Type: Baking & Desserts
Skill Level: Intermediate
Final Quantity: 12 servings
What You'll Need
For the Cake
- 2 cups all-purpose flour
- 1 ½ cups sugar
- 1 cup unsalted butter, softened
- 4 large eggs
- 1 cup whole milk
- 2 tsp vanilla extract
- 1 ½ tsp baking powder
- 1 tsp baking soda
- ½ tsp salt
For the Buttercream Frosting
- 2 cups unsalted butter, softened
- 4 cups powdered sugar
- 2 tsp vanilla extract
- 2 tbsp heavy cream
- Food coloring (optional)
How-To Steps
Preheat the oven to 350°F (175°C). In a mixing bowl, cream the softened butter and sugar until light and fluffy. Add the eggs one by one, mixing well after each addition. Incorporate the milk and vanilla extract.
In a separate bowl, whisk together the flour, baking powder, baking soda, and salt. Gradually add the dry ingredients to the wet mixture, blending until just combined.
Divide the batter evenly between two greased and floured 9-inch round cake pans. Bake for 25-30 minutes or until a toothpick inserted in the center comes out clean. Allow the cakes to cool completely before removing them from the pans.
While the cakes are cooling, prepare the buttercream frosting. Beat the softened butter in a bowl until creamy, then gradually incorporate the powdered sugar. Add the vanilla extract and heavy cream, mixing until smooth and fluffy. Add food coloring if desired.
Once the cakes are cooled, place one layer on a serving plate. Spread a generous amount of frosting on top, then place the second layer over it. Use the remaining frosting to cover the top and sides of the cake.
Extra Tips
- To enhance flavor, consider using almond extract in the batter. This cake can be made a day ahead
- just store it in an airtight container to keep it fresh.
Nutritional Breakdown (Per Serving)
- Calories: 380 kcal
- Total Fat: 26g
- Saturated Fat: 15g
- Cholesterol: 195mg
- Sodium: 85mg
- Total Carbohydrates: 32g
- Dietary Fiber: 3g
- Sugars: 24g
- Protein: 6g