No-Bake Reese's Peanut Butter Bars
Highlighted under: Baking & Desserts
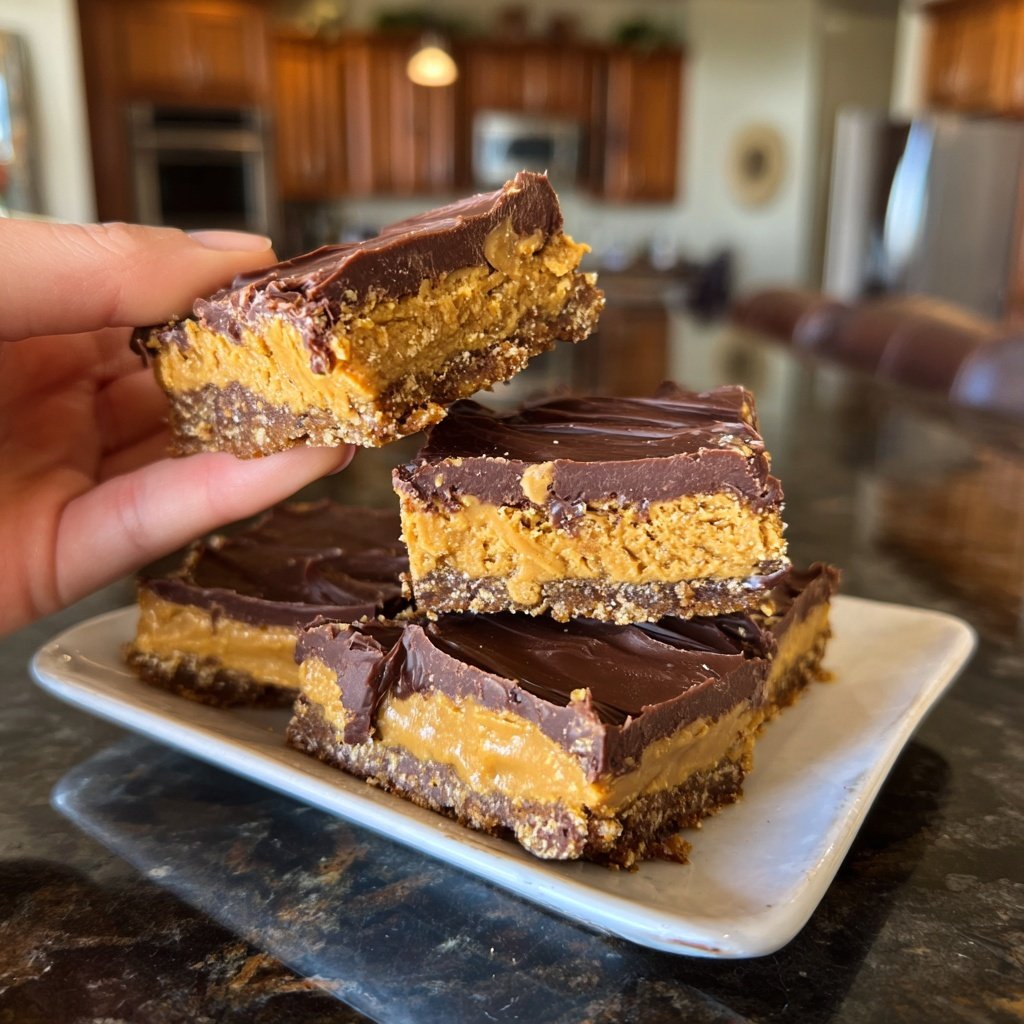
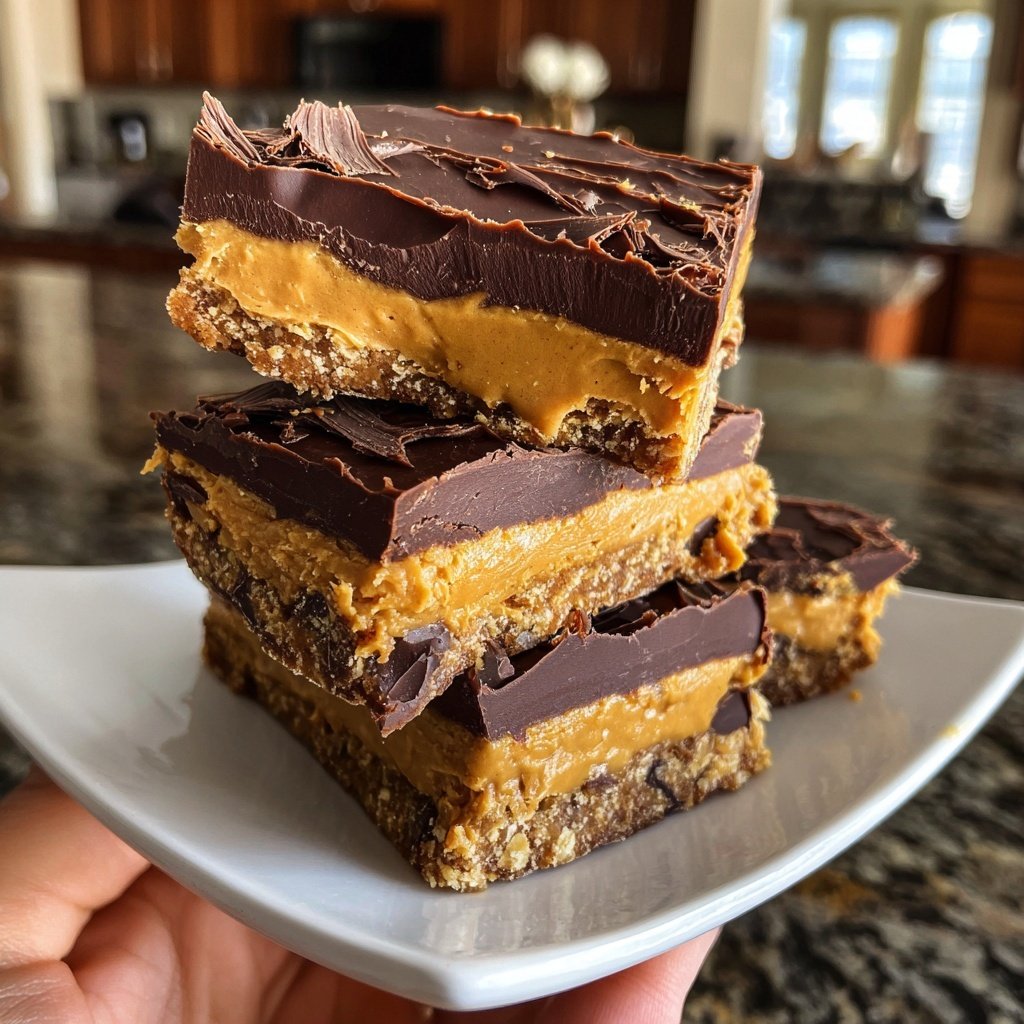
I love making No-Bake Reese's Peanut Butter Bars because they effortlessly blend rich flavors with a creamy texture. The combination of peanut butter and chocolate is always a hit in my household, and since there's no baking involved, it's an easy treat to whip up. These bars are perfect for any occasion, from family gatherings to casual snacking. Once people try them, they always ask for the recipe, and I get to enjoy their delighted reactions as they indulge in these sweet bites.
When I first decided to make No-Bake Reese's Peanut Butter Bars, I was skeptical about whether they could really capture that signature flavor without the oven. To my delight, each bite of these bars tasted just like the beloved candy. The key was using just the right balance of peanut butter and powdered sugar to create a deliciously creamy filling that holds perfectly once chilled.
One tip I found helpful was to let the bars chill in the fridge for a few hours before cutting them. This not only helps them set but also enhances the flavors. It’s so rewarding to see friends and family light up when they taste something I've whipped up without even turning on the oven!
Why You'll Love This Recipe
- Quick and easy to make with no baking required
- Rich, creamy peanut butter flavor that satisfies your sweet tooth
- Perfectly sweet with a crunchy chocolate layer on top
- Great for parties, gatherings, or simply a delicious treat at home
Understanding the Ingredients
The foundation of these No-Bake Reese's Peanut Butter Bars is the combination of creamy peanut butter and graham cracker crumbs. The peanut butter provides a rich, nutty flavor while also acting as a binding agent, ensuring the bars hold their shape without baking. Using creamy peanut butter is key here, as it yields a smooth texture; crunchy peanut butter can alter the consistency and make slicing more challenging.
Graham cracker crumbs not only contribute sweetness but also add a subtle texture contrast. If you don’t have graham crackers, crushed digestive biscuits or even shortbread cookies can serve as suitable substitutes. Just ensure to adjust the sweetness slightly, as different cookies have varied sugar levels, to maintain the balance of flavors.
The Melting Process
Melting the chocolate may seem straightforward, but it requires attention to prevent seizing. When heating the chocolate chips, use a microwave-safe bowl and start with 30-second intervals at medium power, stirring after each interval until the chocolate is fully melted and glossy. If you opt to add vegetable oil, it can enhance the chocolate's pourability and sheen, giving your bars a professional finish.
Avoid overheating the chocolate; if it loses its smoothness or becomes grainy, you can add a teaspoon of vegetable oil and stir vigorously. This can salvage the chocolate by remelting it into a more workable state. Remember to let the chocolate cool slightly before pouring it over the peanut butter layer to avoid disturbing the base.
Storage and Serving Tips
Once your bars have set, it’s essential to store them properly to maintain their firmness and flavor. Keeping them in an airtight container in the refrigerator will help preserve freshness for up to one week. For longer storage, you can freeze the bars; cut them into squares, layer with parchment paper in between, and store in an airtight container. They can be frozen for up to 3 months, allowing you to enjoy them later.
When ready to serve, these bars can be garnished with a sprinkle of sea salt or crushed peanuts to enhance their flavor profile. For a festive twist, consider adding a drizzle of caramel over the top or incorporating chopped Reese's cups into the peanut butter mixture before spreading it into the dish for an extra treat.
Ingredients
For the Bars
- 1 cup creamy peanut butter
- 1/2 cup unsalted butter, melted
- 1 cup powdered sugar
- 1 cup graham cracker crumbs
- 1 cup milk chocolate chips
For the Topping
- 1/2 cup milk chocolate chips
- 1 teaspoon vegetable oil (optional)
Instructions
Prepare the Base
In a large bowl, mix together the melted butter, peanut butter, and powdered sugar until well blended. Stir in the graham cracker crumbs until the mixture is thick and well combined.
Assemble
Press the peanut butter mixture into a lined 9x9 inch baking dish, spreading it evenly across the bottom. Use a spatula to smooth the top.
Melt the Chocolate
In a microwave-safe bowl, combine the milk chocolate chips and, if desired, vegetable oil. Heat in 30-second intervals, stirring in between, until smooth and melted.
Top the Bars
Pour the melted chocolate over the pressed peanut butter layer and spread evenly. Refrigerate for at least 2 hours, or until set.
Cut and Serve
Once set, remove from the refrigerator and lift the bars out of the dish using the parchment paper. Cut into squares and enjoy!
Pro Tips
- For extra flavor, consider adding a pinch of salt to the peanut butter mixture or topping with crushed peanuts for a bit of crunch.
Common Troubleshooting
If your bars are too soft after refrigeration, it might be due to using natural peanut butter, which contains more oil than conventional creamy varieties. To remedy this, you can add a bit more graham cracker crumbs or powdered sugar, which will help solidify the texture. Next time, try using a brand that has more stabilizers to ensure a firmer result.
Conversely, if the base feels too crumbly, adding a tablespoon or two of melted butter can help bind the ingredients better. Mixing vigorously ensures all components are integrated well, creating a uniform texture that will slice nicely once set.
Variations to Explore
Feel free to get creative with the toppings! Instead of just chocolate, you could use white chocolate or dark chocolate for a different flavor experience. Chopped nuts or coconut flakes can also be sprinkled on top before the chocolate sets, adding crunch and additional taste dimensions.
For a healthier version, consider substituting the milk chocolate chips with a dark chocolate variety that's lower in sugar or using nut butter made from a blend of nuts like almond or cashew. These alternatives might alter the taste slightly but can yield equally delicious outcomes while appealing to different dietary preferences.
Questions About Recipes
→ Can I substitute natural peanut butter?
Yes, you can use natural peanut butter, but the texture may differ slightly due to the lack of added sugars and oils.
→ How do I store these bars?
Store the bars in an airtight container in the refrigerator for up to one week.
→ Can I use dark chocolate instead?
Absolutely! Dark chocolate will give a more intense flavor and pair nicely with the sweetness of the peanut butter.
→ Is there a vegan option?
Yes, use vegan butter and dark chocolate to make these bars dairy-free.
No-Bake Reese's Peanut Butter Bars
Created by: The Epicurelane Team
Recipe Type: Baking & Desserts
Skill Level: Easy
Final Quantity: 16 bars
What You'll Need
For the Bars
- 1 cup creamy peanut butter
- 1/2 cup unsalted butter, melted
- 1 cup powdered sugar
- 1 cup graham cracker crumbs
- 1 cup milk chocolate chips
For the Topping
- 1/2 cup milk chocolate chips
- 1 teaspoon vegetable oil (optional)
How-To Steps
In a large bowl, mix together the melted butter, peanut butter, and powdered sugar until well blended. Stir in the graham cracker crumbs until the mixture is thick and well combined.
Press the peanut butter mixture into a lined 9x9 inch baking dish, spreading it evenly across the bottom. Use a spatula to smooth the top.
In a microwave-safe bowl, combine the milk chocolate chips and, if desired, vegetable oil. Heat in 30-second intervals, stirring in between, until smooth and melted.
Pour the melted chocolate over the pressed peanut butter layer and spread evenly. Refrigerate for at least 2 hours, or until set.
Once set, remove from the refrigerator and lift the bars out of the dish using the parchment paper. Cut into squares and enjoy!
Extra Tips
- For extra flavor, consider adding a pinch of salt to the peanut butter mixture or topping with crushed peanuts for a bit of crunch.
Nutritional Breakdown (Per Serving)
- Calories: 250 kcal
- Total Fat: 18g
- Saturated Fat: 8g
- Cholesterol: 15mg
- Sodium: 120mg
- Total Carbohydrates: 22g
- Dietary Fiber: 1g
- Sugars: 14g
- Protein: 5g