Easter Egg Oreo Balls
Highlighted under: Baking & Desserts
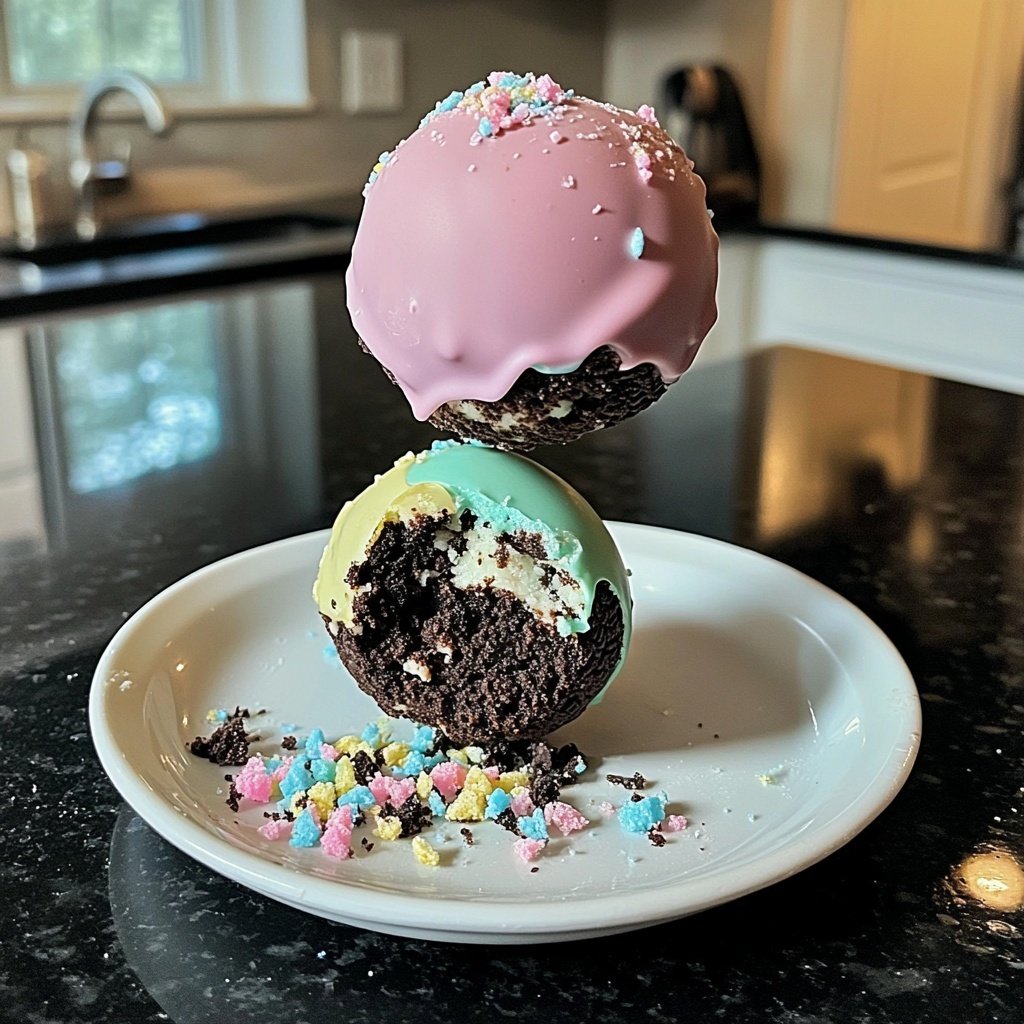
These delightful Easter Egg Oreo Balls are a fun and easy treat to make for the holiday season. With a rich Oreo flavor and a creamy coating, they are sure to be a hit with everyone!
These Easter Egg Oreo Balls are a sweet and festive treat that combines the classic flavors of Oreo cookies with a creamy filling. Perfect for holiday gatherings, they are simple to make and can be decorated to fit the Easter theme!
Why You'll Love These Easter Egg Oreo Balls
- Rich Oreo flavor with a creamy filling
- Fun and festive Easter egg shape
- No baking required, making them quick to prepare
- Customizable decorations for a personal touch
The Perfect Easter Treat
Easter is a time for family gatherings and festive celebrations, and what better way to celebrate than with these delightful Easter Egg Oreo Balls? These treats not only capture the spirit of the holiday but also offer a rich and indulgent flavor that everyone will love. The combination of crushed Oreo cookies and creamy cream cheese creates a decadent filling, while the white chocolate coating adds a touch of elegance and sweetness.
These Oreo balls are incredibly versatile, making them a great addition to your Easter dessert table. You can easily customize them with various toppings, such as colorful sprinkles or edible glitter, to match your Easter theme. This fun and interactive activity allows kids and adults alike to get creative and add their personal touch to each ball.
No-Bake Convenience
One of the best aspects of these Easter Egg Oreo Balls is that they require no baking. This makes them an ideal treat for busy hosts who want to prepare something special without the hassle of turning on the oven. With just a few simple steps, you can have a batch of these delicious treats ready to impress your guests in no time.
The no-bake nature of this recipe also means that you can easily prepare them in advance. Whether you're getting ready for an Easter brunch, a family gathering, or a festive party, these Oreo balls can be made ahead of time and stored in the refrigerator until you're ready to serve them. This simple convenience frees up your time for other important holiday preparations.
A Fun Activity for All Ages
Making Easter Egg Oreo Balls is not just about the final product; it's also a fun activity that can involve the whole family. Kids will love helping to crush the Oreos and roll the balls, while adults can assist with the melting of the chocolate and decorating. This collaborative effort can create lasting memories and traditions that you'll cherish for years to come.
Moreover, these Oreo balls can be a fantastic addition to your Easter egg hunt. Instead of traditional candy, consider hiding these delicious treats around your home or yard. Their festive shape will delight children and adults alike, adding an extra layer of excitement to the holiday festivities.
Ingredients
For the Oreo Balls
- 1 package (15.25 oz) Oreo cookies
- 8 oz cream cheese, softened
- 1 cup white chocolate chips
- 1 tablespoon coconut oil
- Easter-themed sprinkles (optional)
Make sure to have all ingredients ready before you start!
Instructions
Crush the Oreos
In a food processor, crush the Oreo cookies into fine crumbs. You can also place them in a zip-top bag and crush them with a rolling pin.
Mix with Cream Cheese
In a large bowl, combine the crushed Oreos with softened cream cheese. Mix until well combined and a dough forms.
Form the Balls
Using your hands, roll the mixture into small balls, about 1 inch in diameter. Place them on a baking sheet lined with parchment paper.
Chill the Balls
Refrigerate the balls for about 30 minutes to firm up.
Melt the Chocolate
In a microwave-safe bowl, melt the white chocolate chips with coconut oil. Heat in 30-second intervals, stirring in between, until smooth.
Coat the Balls
Dip each chilled Oreo ball into the melted chocolate, ensuring they are fully coated. Return them to the baking sheet.
Add Sprinkles
If desired, sprinkle Easter-themed sprinkles on top before the chocolate sets.
Let Set
Allow the chocolate to harden completely at room temperature or in the refrigerator.
Once set, your Easter Egg Oreo Balls are ready to be enjoyed!
Pro Tips
- For a fun twist, try using different types of chocolate or adding flavor extracts to the cream cheese mixture.
Storage and Shelf Life
Once you've made your Easter Egg Oreo Balls, you might be wondering about the best way to store them. These treats can be kept in an airtight container in the refrigerator for up to one week. This allows the flavors to meld beautifully while keeping them fresh and delicious.
If you want to extend their shelf life, consider freezing them. Simply place the Oreo balls in a single layer on a baking sheet, freeze until solid, and then transfer them to a freezer-safe container. When you're ready to enjoy, let them thaw in the refrigerator for a few hours.
Creative Customizations
While the classic version of these Oreo balls is simply irresistible, there are countless ways to customize them to your taste. Consider adding different flavor extracts, such as peppermint or almond, to the cream cheese mixture for a unique twist. You can also experiment with dark or milk chocolate coatings instead of white chocolate for a different flavor profile.
For those who enjoy a little crunch, try mixing in some chopped nuts or crushed candies into the Oreo mixture before rolling them into balls. This adds an extra layer of texture and flavor that elevates the classic treat to new heights.
Serving Suggestions
When it comes to serving your Easter Egg Oreo Balls, presentation is key. Arrange them on a decorative platter or tiered cake stand to create an eye-catching display. You can also place them in colorful cupcake liners for an added festive touch. This makes them not only a delicious treat but also a beautiful centerpiece for your Easter celebrations.
Pair these Oreo balls with a variety of other Easter treats, such as mini cupcakes, cookies, or fruit platters, to create a delightful dessert spread. Guests will appreciate the variety and will be drawn to the unique flavors and festive decorations.
Questions About Recipes
→ Can I use low-fat cream cheese?
Yes, low-fat cream cheese can be used, but it may affect the creaminess of the Oreo balls.
→ How long can I store these Oreo balls?
They can be stored in an airtight container in the refrigerator for up to a week.
→ Can I freeze these Oreo balls?
Yes, you can freeze them for up to 2 months. Just make sure to separate them with parchment paper to prevent sticking.
→ What other toppings can I use?
You can use crushed nuts, colored sugar, or drizzle with dark chocolate for added flair.
Easter Egg Oreo Balls
Created by: The Epicurelane Team
Recipe Type: Baking & Desserts
Skill Level: Easy
Final Quantity: 24 balls
What You'll Need
For the Oreo Balls
- 1 package (15.25 oz) Oreo cookies
- 8 oz cream cheese, softened
- 1 cup white chocolate chips
- 1 tablespoon coconut oil
- Easter-themed sprinkles (optional)
How-To Steps
In a food processor, crush the Oreo cookies into fine crumbs. You can also place them in a zip-top bag and crush them with a rolling pin.
In a large bowl, combine the crushed Oreos with softened cream cheese. Mix until well combined and a dough forms.
Using your hands, roll the mixture into small balls, about 1 inch in diameter. Place them on a baking sheet lined with parchment paper.
Refrigerate the balls for about 30 minutes to firm up.
In a microwave-safe bowl, melt the white chocolate chips with coconut oil. Heat in 30-second intervals, stirring in between, until smooth.
Dip each chilled Oreo ball into the melted chocolate, ensuring they are fully coated. Return them to the baking sheet.
If desired, sprinkle Easter-themed sprinkles on top before the chocolate sets.
Allow the chocolate to harden completely at room temperature or in the refrigerator.
Extra Tips
- For a fun twist, try using different types of chocolate or adding flavor extracts to the cream cheese mixture.
Nutritional Breakdown (Per Serving)
- Calories: 120 kcal
- Total Fat: 8g
- Saturated Fat: 4g
- Cholesterol: 15mg
- Sodium: 50mg
- Total Carbohydrates: 12g
- Dietary Fiber: 0g
- Sugars: 10g
- Protein: 1g